Transitioning to solar energy is an excellent way to reduce your carbon footprint and energy bills, but the installation process varies significantly depending on your roof type. Different roofing materials require specific mounting techniques to ensure both the integrity of your roof and the stability of your solar array. This comprehensive guide explores the unique approaches to solar panel installation on three common roofing materials: asphalt shingles, metal, and tile. Understanding these differences will help you prepare for a successful solar project regardless of your home’s roof type.
Evaluating Your Roof for Solar Compatibility
Before diving into specific installation methods, it’s important to assess whether your roof is suitable for solar panels. The ideal roof for solar installation has sufficient structural strength, faces the proper direction (typically south in the Northern Hemisphere), and receives minimal shade throughout the day. A professional roof inspection is recommended to confirm your roof’s condition and remaining lifespan. Since solar panels typically last 25-30 years, it’s best to install them on a roof with at least 15-20 years of life left to avoid the cost of removing and reinstalling the system during a roof replacement.
Age, pitch, and available space also play crucial roles in determining solar compatibility. Most residential solar installations require between 300-500 square feet of roof space, depending on your energy needs. Working with a qualified solar installer who can accurately assess your specific roof situation is essential for a successful installation. Many homeowners consult with experts from AskHomey to find reliable solar installers who specialize in their particular roof type.
Solar Panel Installation on Asphalt Shingle Roofs
Asphalt shingle roofs are the most common residential roofing material in the United States, and fortunately, they’re also among the easiest for solar panel installation. The standard approach involves a penetrating mount system where installers attach brackets directly to the roof’s rafters or trusses. These brackets, often called “lag bolts” or “lag screws,” penetrate through the shingles and into the structural wood beneath.
During solar on asphalt roof installations, professionals will carefully locate the rafters using a stud finder, then install flashing around each penetration point to create a watertight seal. This flashing is crucial to prevent leaks and water damage. The mounting hardware is then secured to these attachment points, creating a rail system upon which the solar panels are mounted. While this process does involve making holes in your roof, when properly installed by experienced professionals, these penetrations are completely weatherproof and designed to last the lifetime of your solar system.
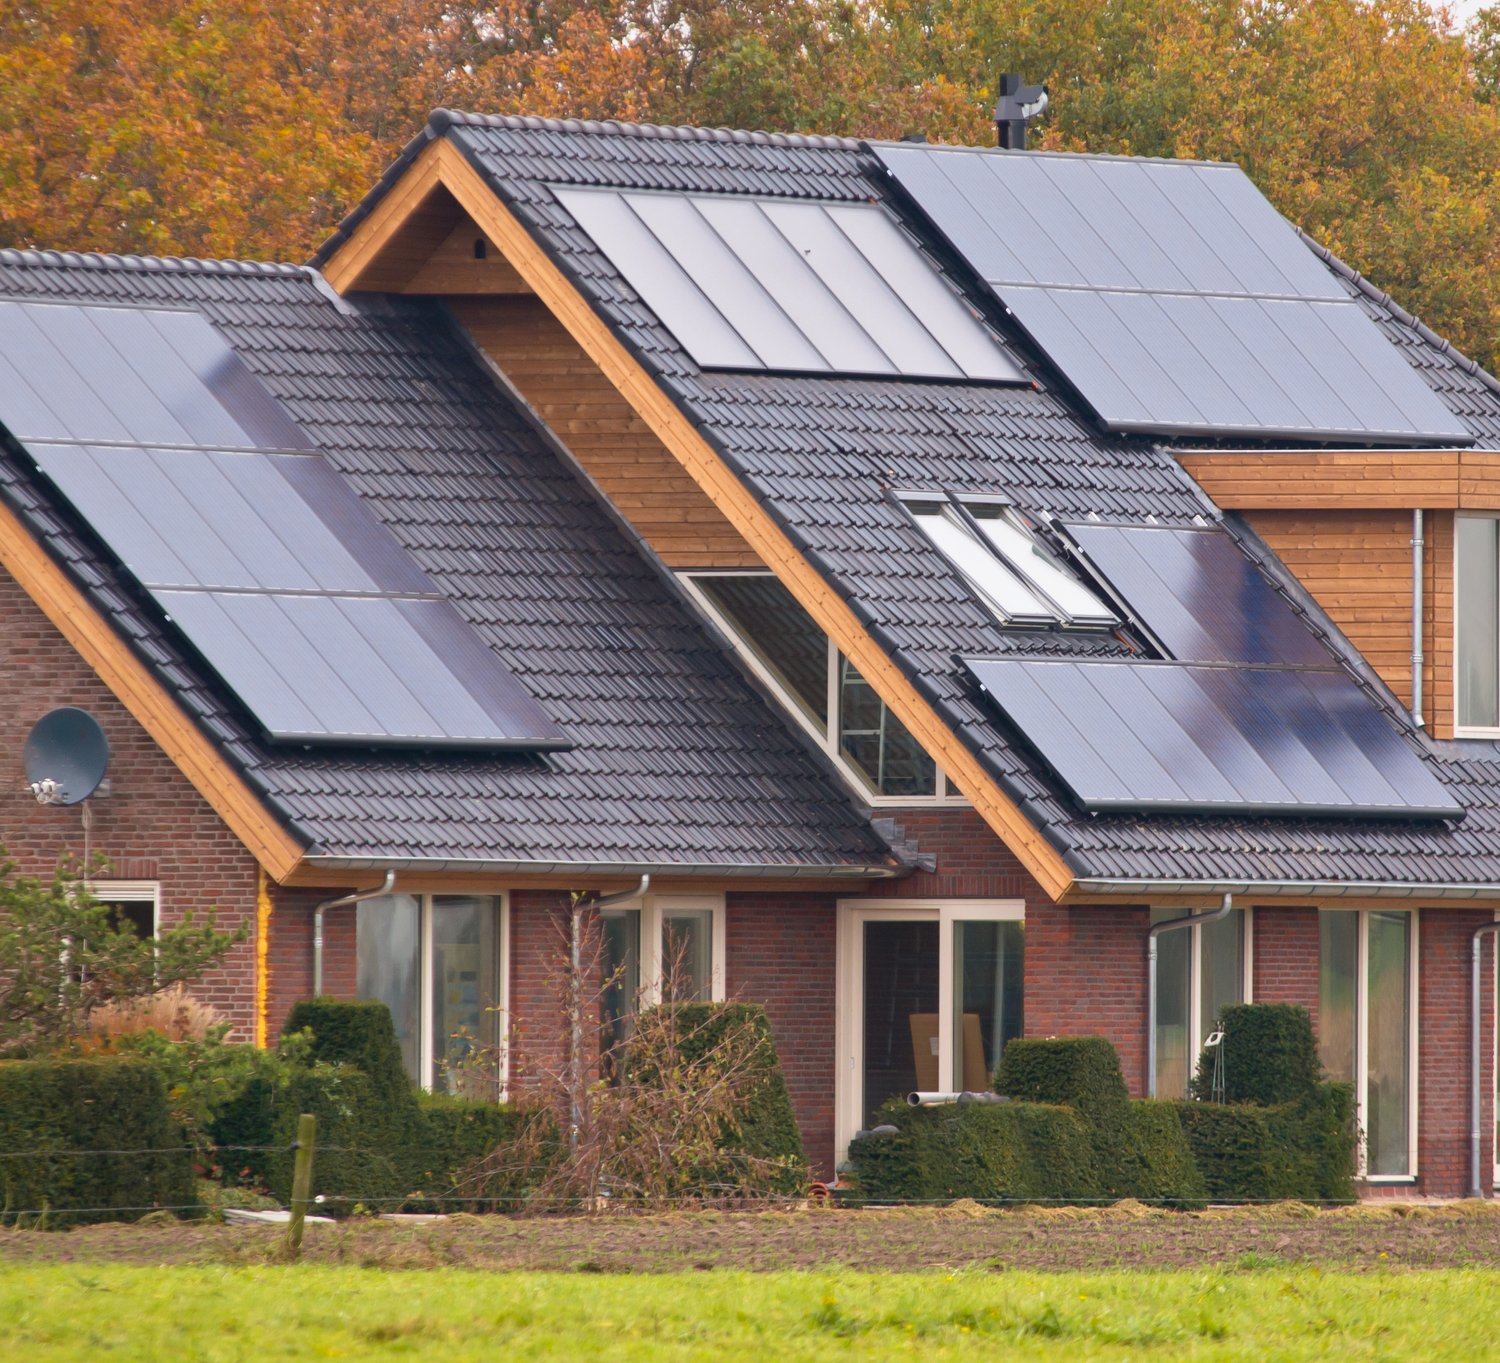
Mounting Solar Panels on Metal Roofs
Metal roofs present unique advantages for solar installations, often resulting in faster and sometimes less expensive mounting processes. The approach varies significantly depending on whether you have a standing seam metal roof or a corrugated/ribbed metal roof.
For standing seam metal roofs, installers can use non-penetrating clamps that attach directly to the raised seams without drilling any holes. These specialized S-5 clamps or similar products grip onto the seams, providing a secure attachment point for the solar mounting system. This solar on metal roof technique preserves roof warranties, eliminates potential leak points, and significantly reduces installation time.
For corrugated or ribbed metal roofs, the installation is more similar to asphalt shingles, requiring penetrating mounts. However, installers must use specialized fasteners designed for metal roofing, along with proper weatherproofing techniques including rubber gaskets and sealants to ensure waterproofing at each penetration point. The penetrations must be placed at the high points of the ribs rather than the valleys to minimize the risk of leaks.
Special Considerations for Tile Roof Solar Installations
Installing solar panels on tile roofs presents the greatest challenges and typically costs more than other roof types. Tile roofs require special care to avoid cracking or damaging the tiles during installation. There are several approaches to solar on tile roof installations, each with its own advantages and considerations.
The most common method involves removing tiles at the mounting locations, installing brackets attached to the roof structure, and then replacing the tiles around these brackets. Specially designed tile hooks or tile replacement mounts allow the mounting hardware to extend above the tile surface while maintaining weatherproofing. Some systems use tile replacement flashing, where a metal flashing piece replaces a tile and provides the mounting point.
Another approach, though less common due to potential long-term reliability concerns, is a non-penetrating system that uses high-strength adhesives to secure mounting points directly to the tiles. This method eliminates the need to drill into the roof structure but may not be suitable for all tile types or in regions with extreme weather conditions.
Making Your Final Decision
Regardless of your roof type, proper installation by experienced professionals is critical to the success and longevity of your solar system. Always choose installers who have specific experience with your roof material and can provide references for similar projects. The initial investment for solar panel installation varies depending on your roof type, with tile roofs typically being the most expensive, followed by metal, and then asphalt shingles.
Remember that the specific mounting solutions for your roof should always prioritize maintaining your roof’s integrity and weatherproofing capabilities while providing secure attachment points for your solar array. By understanding the unique requirements of your roof type, you can better prepare for a successful transition to clean, renewable solar energy.
For more tips and to connect with reliable home service professionals, follow AskHomey on Facebook and Instagram.